
Amazon EventBridge
This page covers how to use Amazon EventBridge as a data source in Rockset by taking advantage of the Rockset Write API.
EventBridge provides a convenient way to produce and deliver events to multiple target destinations. EventBridge offers an API Destination as a target, which supports a generic HTTP endpoint. Users can create a rule with this target type to integrate a wide variety of services with EventBridge like Rockset.
Rockset’s Write API makes it easy to publish documents to a collection. The Write API can be used as the target destination for EventBridge, which provides a low latency ingestion path for events into Rockset.
For the following steps, you must have access to an AWS account and be able to manage AWS IAM policies and IAM users within it.
If you do not have access, please invite your AWS administrator to Rockset.
Create an EventBridge Integration
Amazon outlines most of the steps needed to create an EventBridge Integration using an API Destination. This guide covers the specific configurations needed to integrate EventBridge with Rockset.
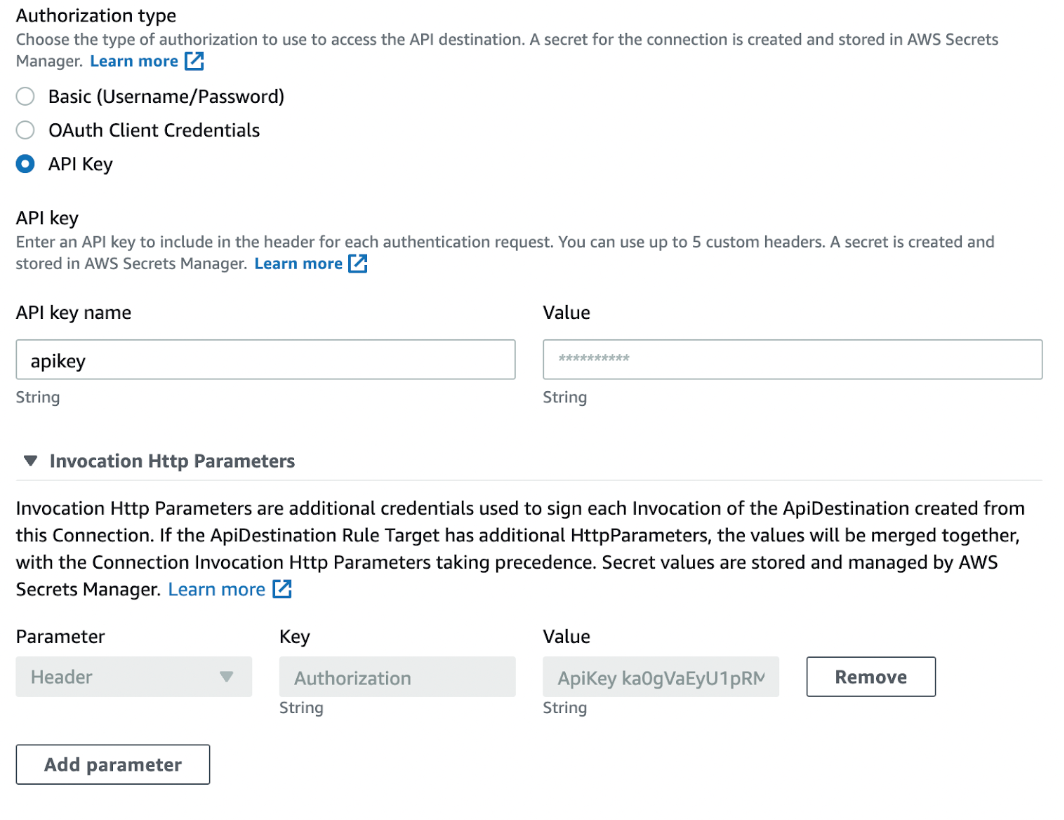
Step 1: Use Rockset Authorization for a Connection
Since the API Destination Connection form does not support an empty password, set the Authorization type to API Key and enter apikey as the API Key Name. Add an Invocation Http Parameter, and set the Parameter type to Header, Key to Authorization, and Value to ApiKey <your Rockset API key>. See the following example from the EventBridge console:
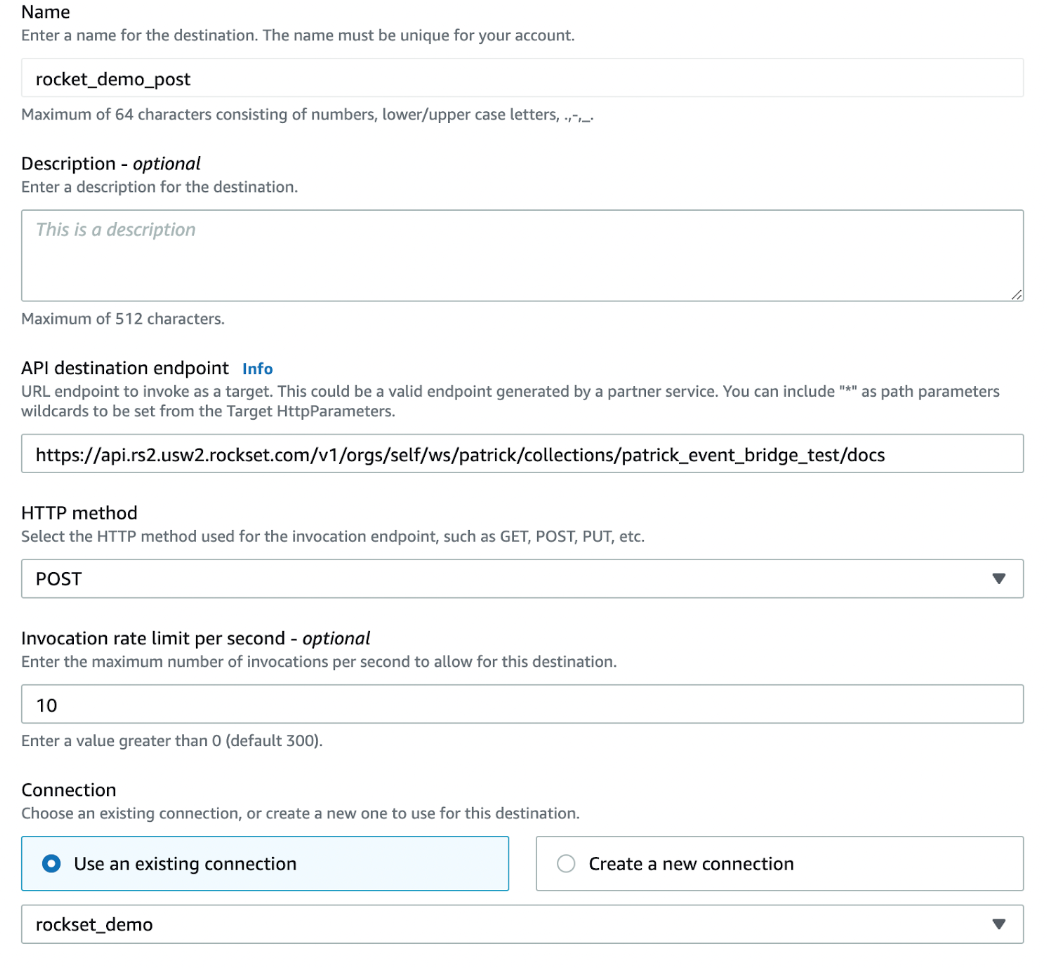
Step 2: Set a Destination Endpoint
Once you have created a connection with the proper authorization, create an API Destination using the Rockset Write API. Ensure you use the region specific Rockset endpoint for the collection. When creating the API Destination, the AWS EventBridge console should appear as follows:
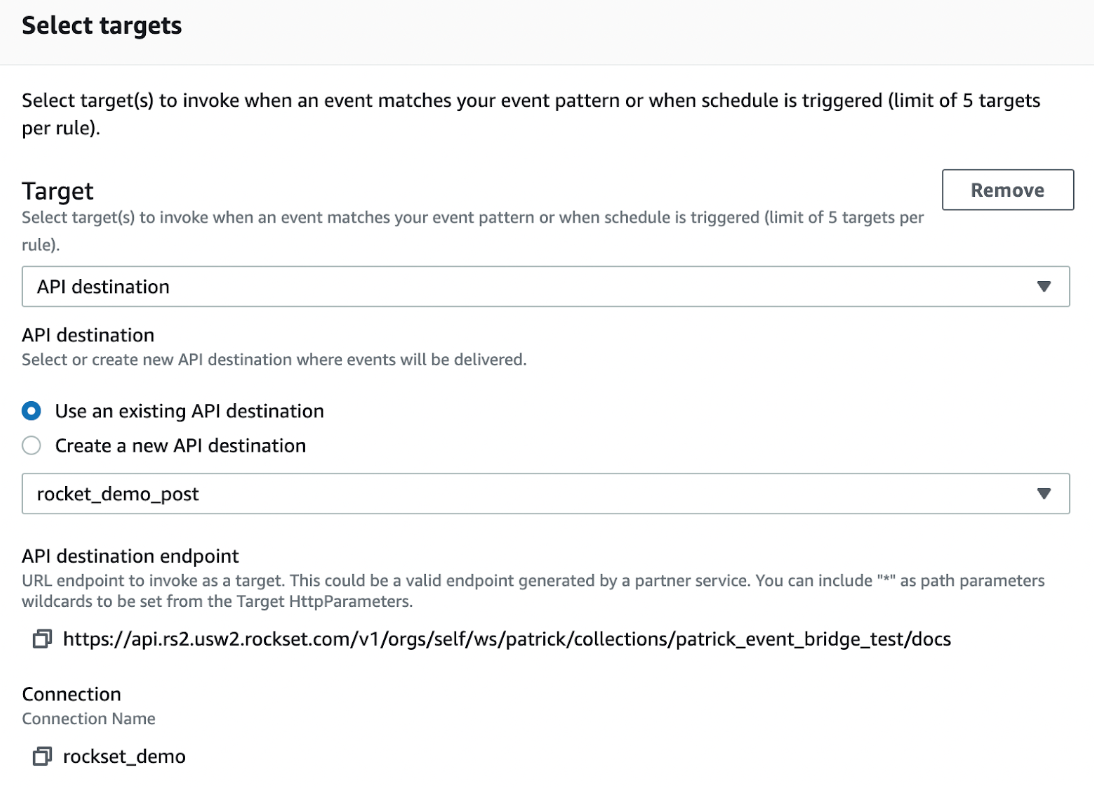
Create a Rule
EventBridge rules define how and where to deliver events. Configuring multiple rules allows you to route events from the same event bus to different target destinations. When creating a rule for Rockset, select the API Destination type and the previously created destination. Here's an example from the EventBridge Console:
Step 1: Set an Input Transformer
The Rockset Write API expects a JSON data wrapper, where the key is data and the value is an array of JSON strings. See the following simple example:
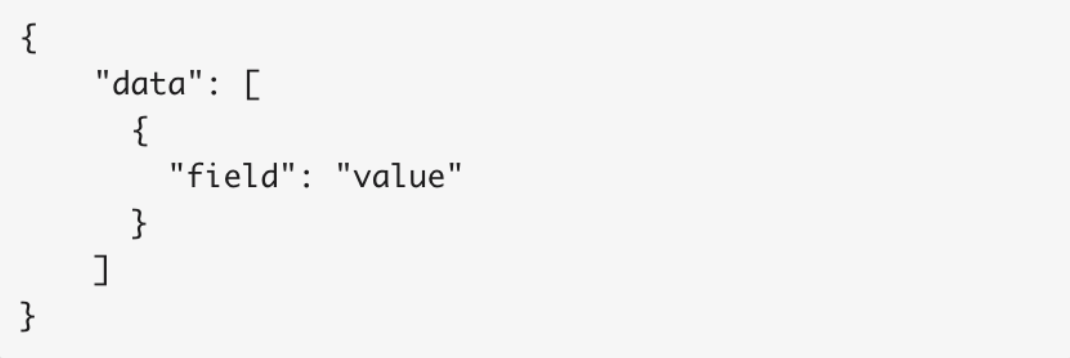
In most cases, your events will not match this format. Fortunately, EventBridge rules have a built-in, input transformer that allows you to construct the format Rockset expects. Under Configure Input select Input transformer. Use the following example syntax to build the JSON wrapper:
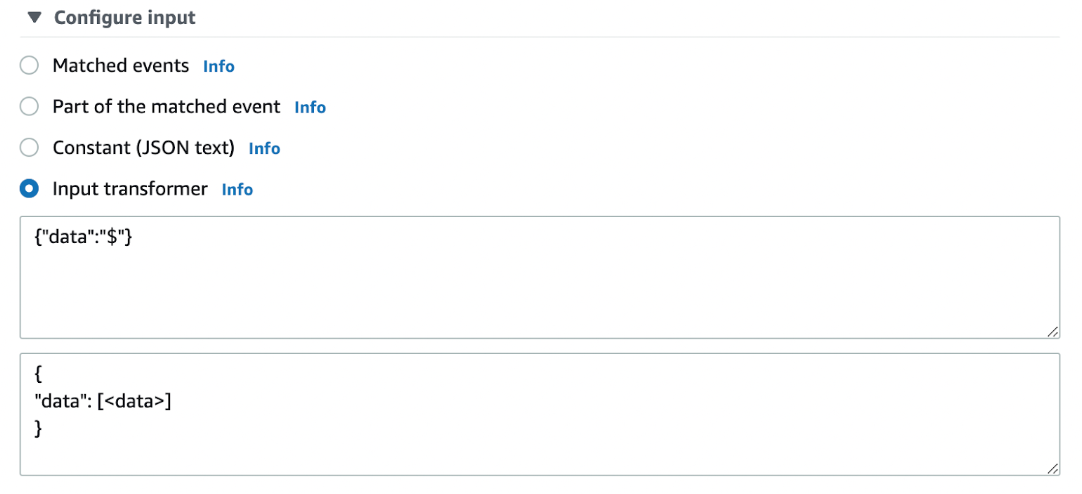
The first box entry selects the entire event using the JSON Path expression $. Depending on your use case, you can select specific parts of events if needed. The second box entry defines the output template for each event and requires constructing a JSON wrapper to put the event into an array.
You can use the default event bus and an event pattern for all events, but EventBridge offers many other ways to specify which events will be caught by the rule.
More information on rule creation can be found here.
Step 2: Validate the Rule
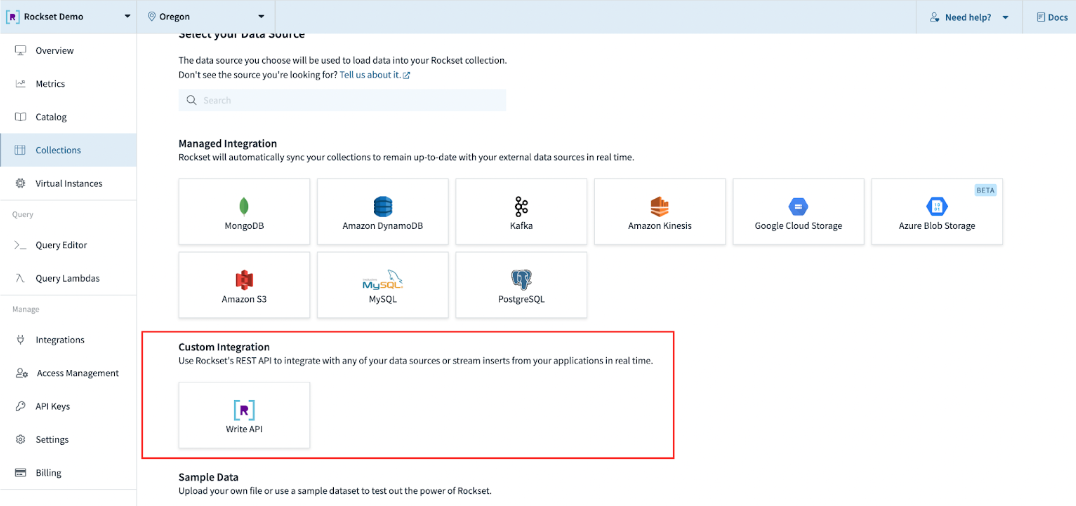
After enabling the rule, you can send test events to Rockset using the EventBridge console. Navigate to the Event Buses link, and find the “Send Events” button in the upper right corner. Select the event bus used in your rule and then publish test events to your Rockset collection. If you haven’t created your Rockset collection yet, you can do so in the Collections tab of the Rockset console by clicking “Create Collection” and choosing the “Write API” tile.
Once you have created your collection and configured EventBridge, you should start seeing events populating into the collection. If you do not see events in the collection, you can troubleshoot the integration by changing the API Destination endpoint to a webhook.site URL and inspecting the posted events. Ensure the authorization header looks correct and the body of the event includes the proper JSON wrapper transformation.
Updated about 1 year ago