Amazon MSK
This page covers how to use an Amazon MSK cluster as a data source in Rockset. This includes:
- Creating an Amazon MSK Integration to securely connect MSK clusters in your AWS
account with Rockset. - Creating a Collection which syncs your data from an Amazon MSK cluster into
Rockset.
For the following steps, you must have access to an AWS account and be able to manage AWS IAM policies and IAM users within it.
If you do not have access, please invite your AWS administrator to Rockset.
Create an MSK Integration
The steps below show how to set up an Amazon MSK integration using AWS Cross-Account IAM Roles. An integration can provide access to one or more MSK clusters within your AWS account. You can use an integration to create collections that sync data from your MSK clusters.
Step 1: Configure Your MSK Cluster
Additionally, you need to configure specific networking and security settings for Rockset to access your MSK cluster. You need to make your MSK cluster public and enable IAM role-based authentication.
Making Your MSK Cluster Public
After creating your MSK cluster, make your cluster public in your cluster's networking settings.
-
Navigate to your cluster in the AWS MSK Management Console.
-
Select the Properties tab under the Cluster summary.

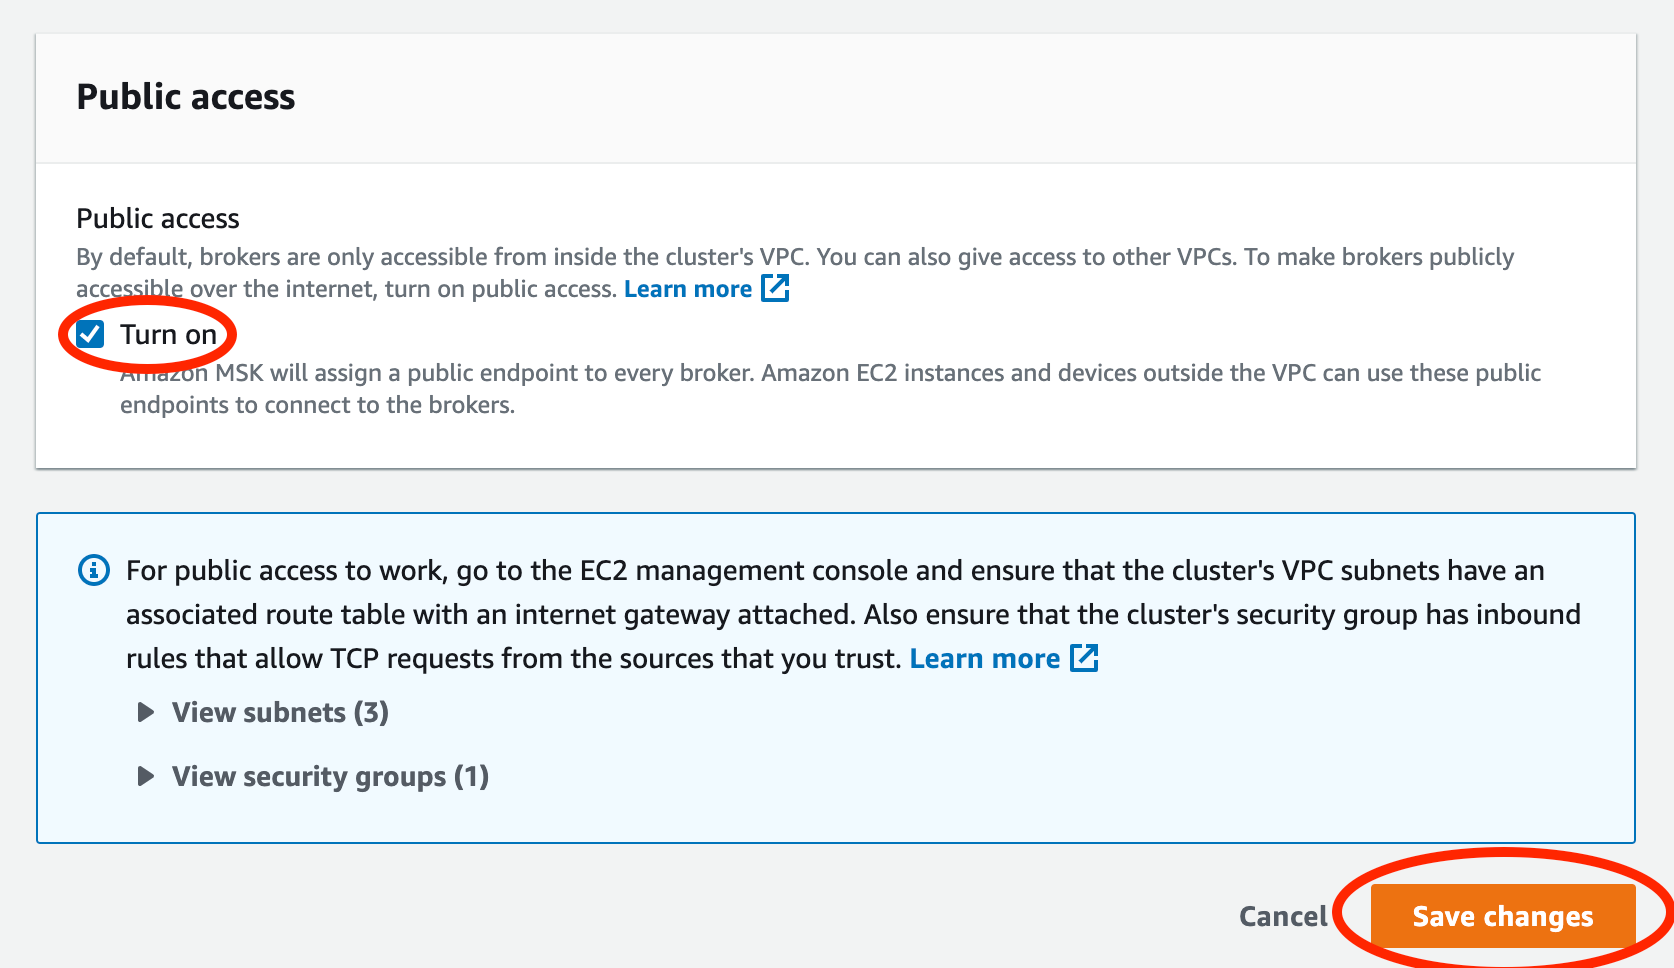
- Go to Networking settings and click "Edit public access".

- Check "Turn on" and then click "Save changes".
Enabling IAM Authentication
If you have not already, you need to enable IAM role-based authentication for your MSK cluster.
-
Navigate to your cluster in the AWS MSK Management Console.
-
Select the Properties tab under the Cluster summary.

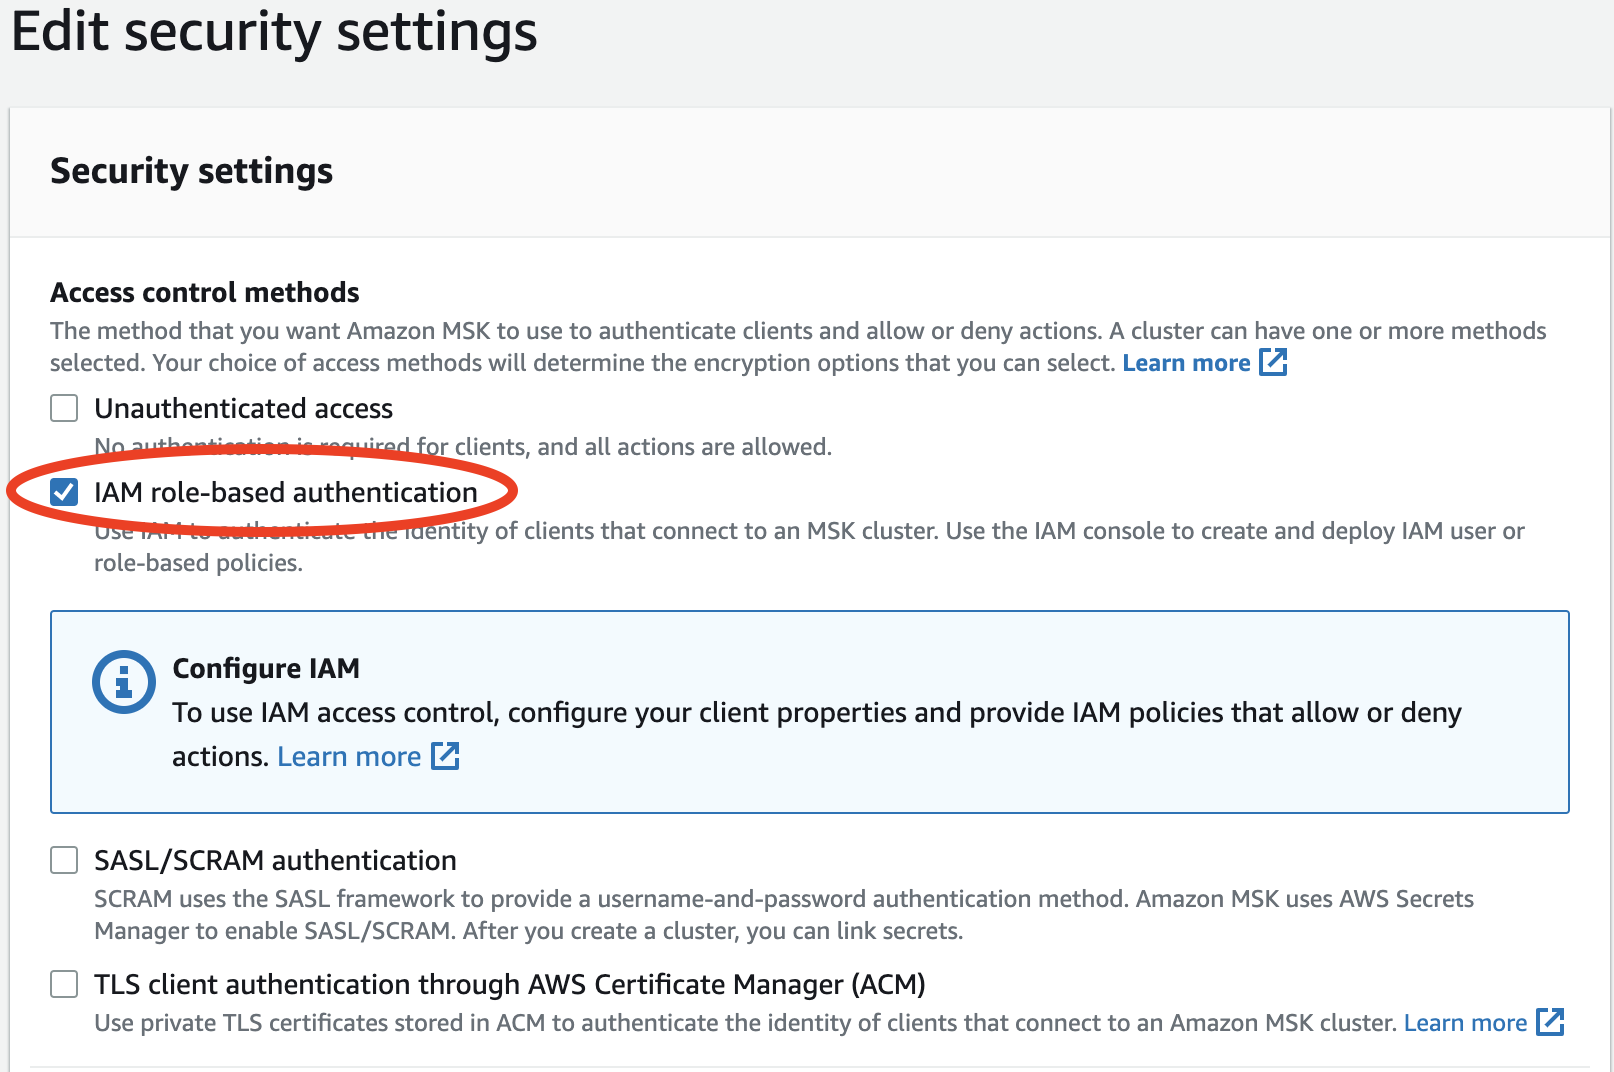
- Go to Security settings and click "Edit".

- Under Access control methods select "IAM role-based authentication" and then click "Save changes".
Step 2: Configure AWS IAM Policy
- Navigate to the IAM Service in the AWS Management Console.
- Set up a new policy by navigating to Policies and clicking "Create policy".
If you already have a policy set up for Rockset, you may update that existing policy.
For more details, refer to AWS Documentation on IAM Policies.

- Set up read-only access to your MSK cluster. You can switch to the
JSONtab and paste the policy shown below. You must replace<your-cluster>with the name of your MSK cluster. If you already have a Rockset policy set up, you can add the body of theStatementattribute to it.
{
  "Version": "2012-10-17",
  "Statement": [
    {
      "Effect": "Allow",
      "Action": [
        "kafka-cluster:Connect",
        "kafka-cluster:ReadData",
        "kafka-cluster:DescribeCluster",
        "kafka-cluster:DescribeTopic",
        "kafka-cluster:DescribeGroup",
        "kafka-cluster:AlterGroup"
      ],
      "Resource": [
        "arn:aws:kafka:*:*:cluster/<your-cluster>/<your-cluster-uuid>",
        "arn:aws:kafka:*:*:topic/<your-cluster>/*",
        "arn:aws:kafka:*:*:group/<your-cluster>/*"
      ]
    }
  ]
}
- Save the newly created or updated policy and give it a descriptive name. You will attach this policy to a role in the next step.
Why these permissions?
kafka-cluster:Connect- Required to connect and authenticate to the cluster.kafka-cluster:ReadData— Required to read data from topics on a cluster.kafka-cluster:DescribeCluster— Required to describe various aspects of the cluster and retrieve
metadata on the cluster.kafka-cluster:DescribeTopic— Required to describe topics on a cluster and retrieve metadata on
the topic.kafka-cluster:DescribeGroup- Required to describe groups on a cluster and retrieve metadata on
the group.kafka-cluster:AlterGroup— Required to join groups on a cluster.
Advanced Permissions
You can set up permission for multiple Kafka topics by modifying the Resource ARNs. The format of the ARN for MSK topics is as follows: arn:aws:kafka:region:account-id:topic/cluster-name/cluster-uuid/topic-name.
You can substitute the following resources in the policy above to grant access to multiple kafka topics as shown below:
- All topics in us-west-2 in a cluster
MyTestClusterregardless of the cluster's UUIDarn:aws:kafka:us-west-2:*:topic/MyTestCluster/*
- All topics starting with "sales" in a cluster
MyTestClusterregardless of the cluster's UUIDarn:aws:kafka:*:*:topic/MyTestCluster/sales*
For more details on how to specify a resource path, refer to AWS documentation on MSK ARNs.
Step 3: AWS Cross-Account IAM Role
The most secure way to grant Rockset access to your AWS account involves giving Rockset's account cross-account access to your AWS account. To do so, you'll need to create an IAM Role that assumes your newly created policy on Rockset's behalf.
You'll need information from the Rockset Console to create and save this integration.
-
Navigate to the IAM service in the AWS Management Console.
-
Setup a new role by navigating to Roles and clicking "Create role".
If you already have a role for Rockset set up, you may re-use it and either add or update the above policy directly.

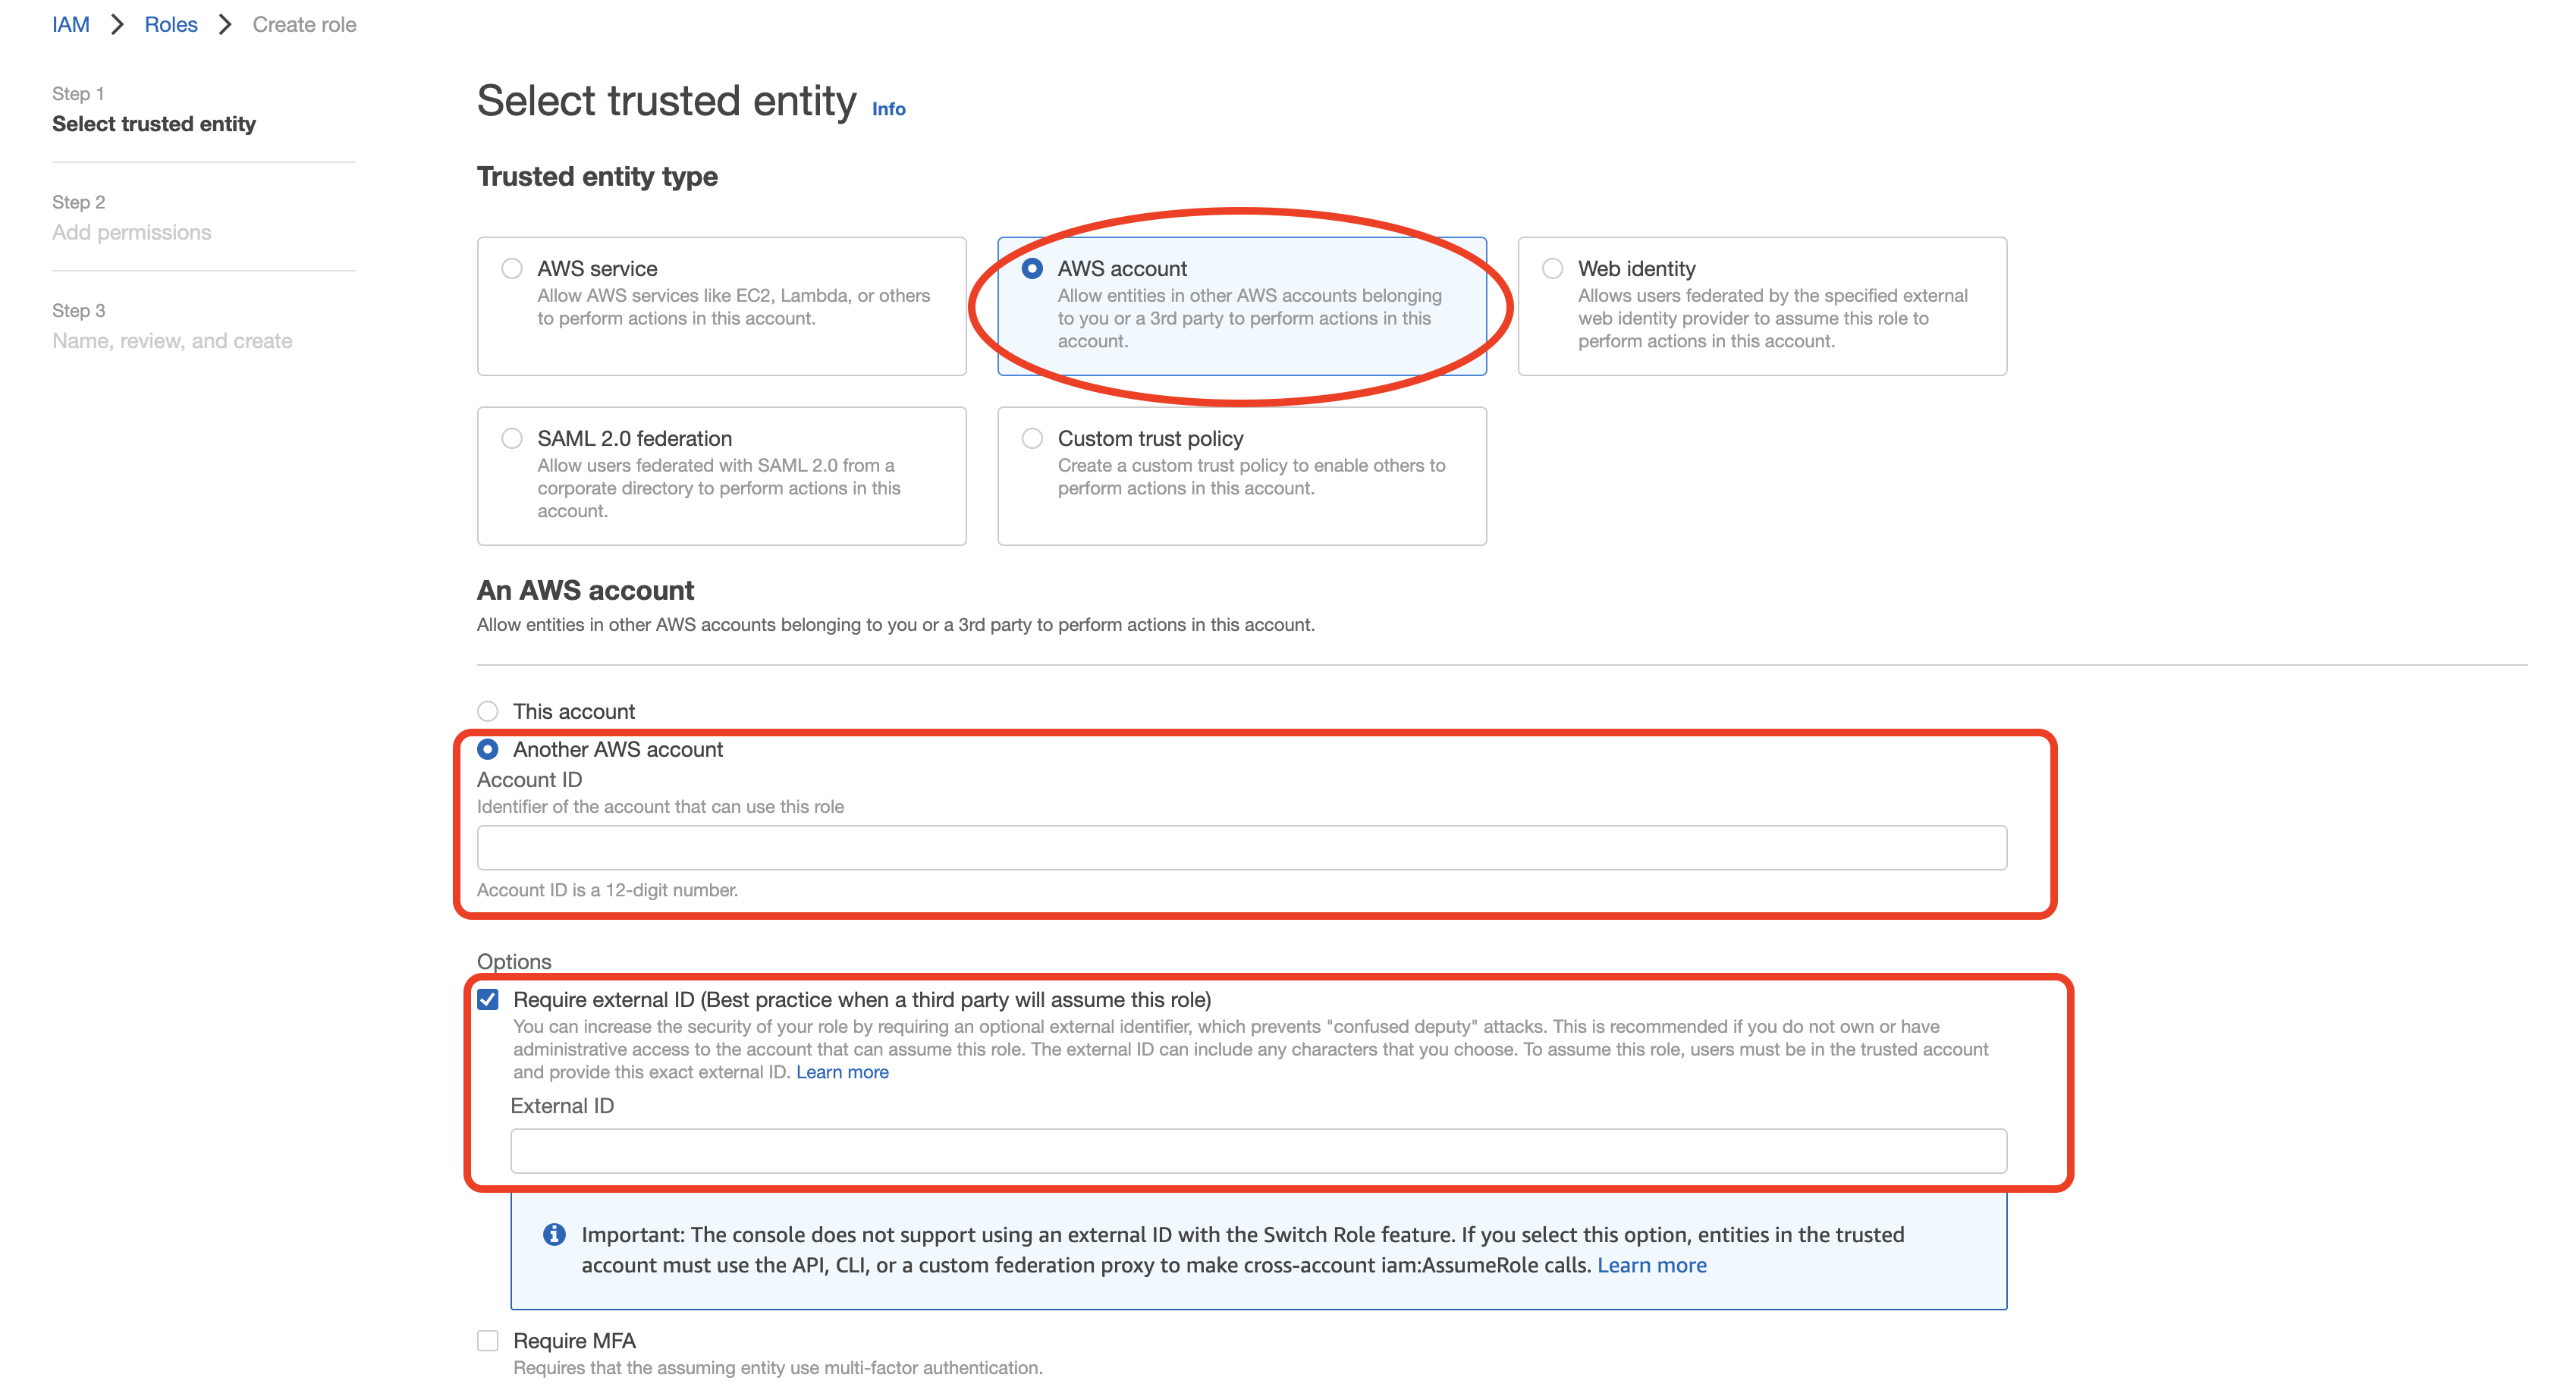
- Select "Another AWS account" as type of trusted entity, and tick the box for "Require External ID". Fill in the Account ID and External ID fields with the values (Rockset Account ID and External ID respectively) found on the Integration page of the Rockset Console (under the Cross-Account Role Option). Click to continue.
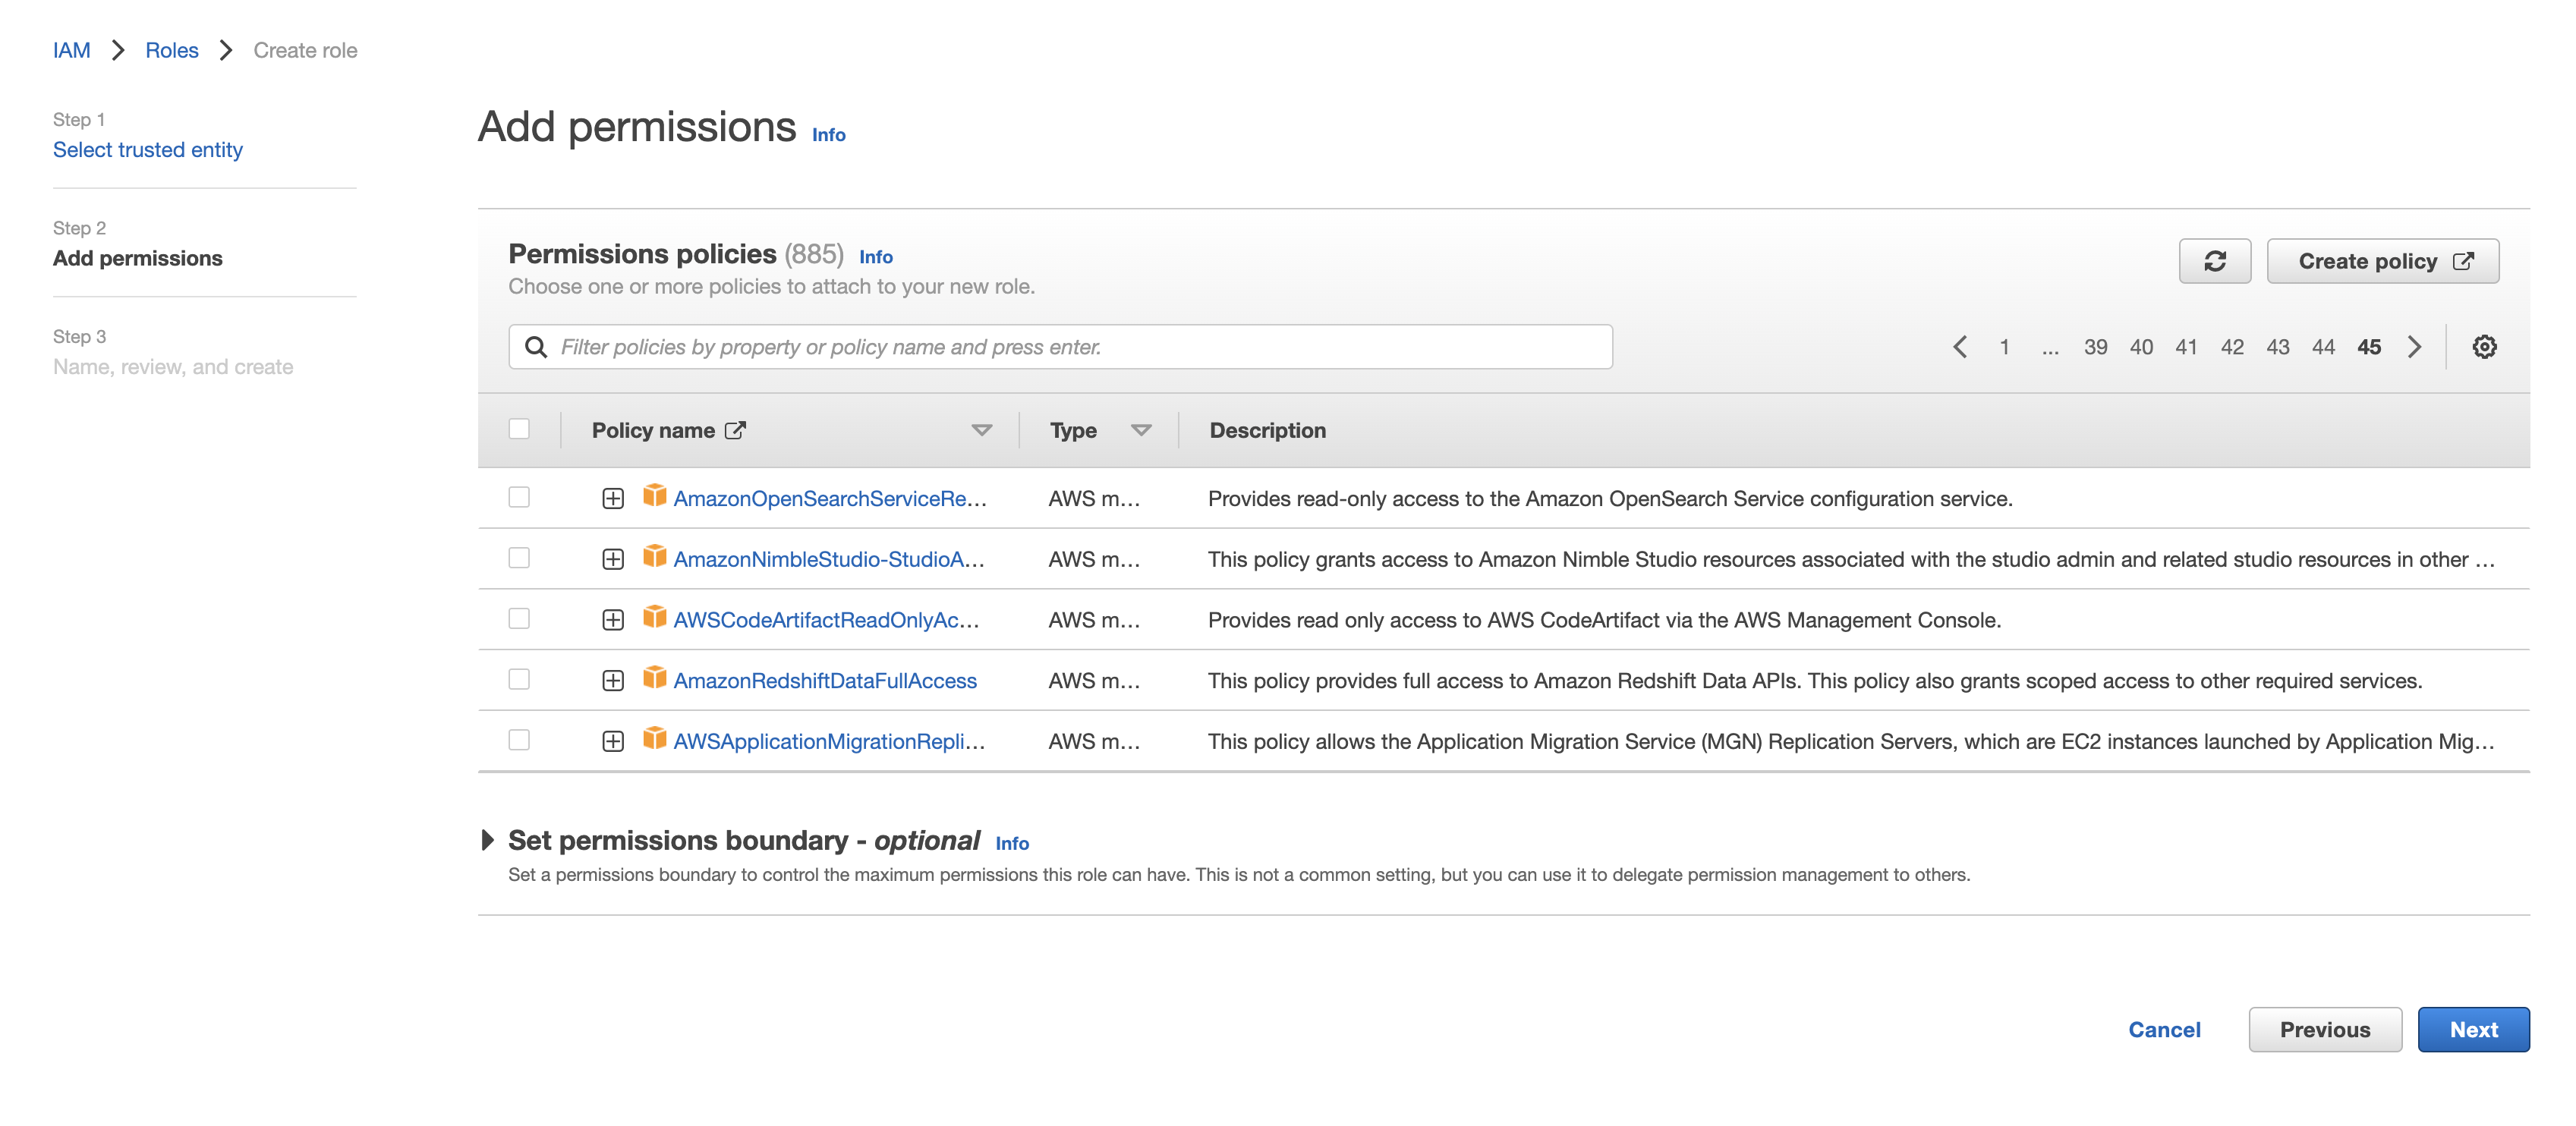
- Choose the policy created for this role in Step 1 (or follow Step 1 now to create the policy if needed). Then, click to continue.
- Optionally add any tags and click "Next". Name the role descriptively, e.g. 'rockset-role', and once finished record the Role ARN for the Rockset integration in the Rockset Console.
Step 4: Get Bootstrap Brokers
-
Navigate to your cluster in the AWS MSK Management Console.
-
Select the "View client information" tab in the Cluster summary.

- Copy the bootstrap servers with IAM authentication type and a public endpoint.

Create an MSK Integration through the REST API
To create an MSK Integration through the Rockset API, you must create a new integration with the type kafka. You must also set the following fields: aws_role, use_v3, and bootstrap_servers. An example of an HTTP request body to create an MSK integration is shown below:
{
  "kafka": {
      "aws_role": {
        "aws_role_arn": "arn:aws:iam::2378964092:role/rockset-role",
        "aws_external_id": "external id of aws"
      },
      "use_v3": "true",
      "bootstrap_servers": "localhost:9092"
    }
}
Rockset supports other Apache Kafka connectors like Confluent Kafka.
Confluent Kafka uses a different authentication method than MSK. Confluent Kafka uses the
security_configobject for authentication, while MSK uses theaws_roleobject for authentication. These fields are mutally exclusive. To create an MSK integration, you must set theaws_rolefield, and you cannot set thesecurity_configfield. Otherwise, the create integration request will fail.
Create a Collection
Follow the steps below to create a collection:
-
Navigate to the Collections tab of the Rockset Console to create a collection from an Amazon MSK source.
-
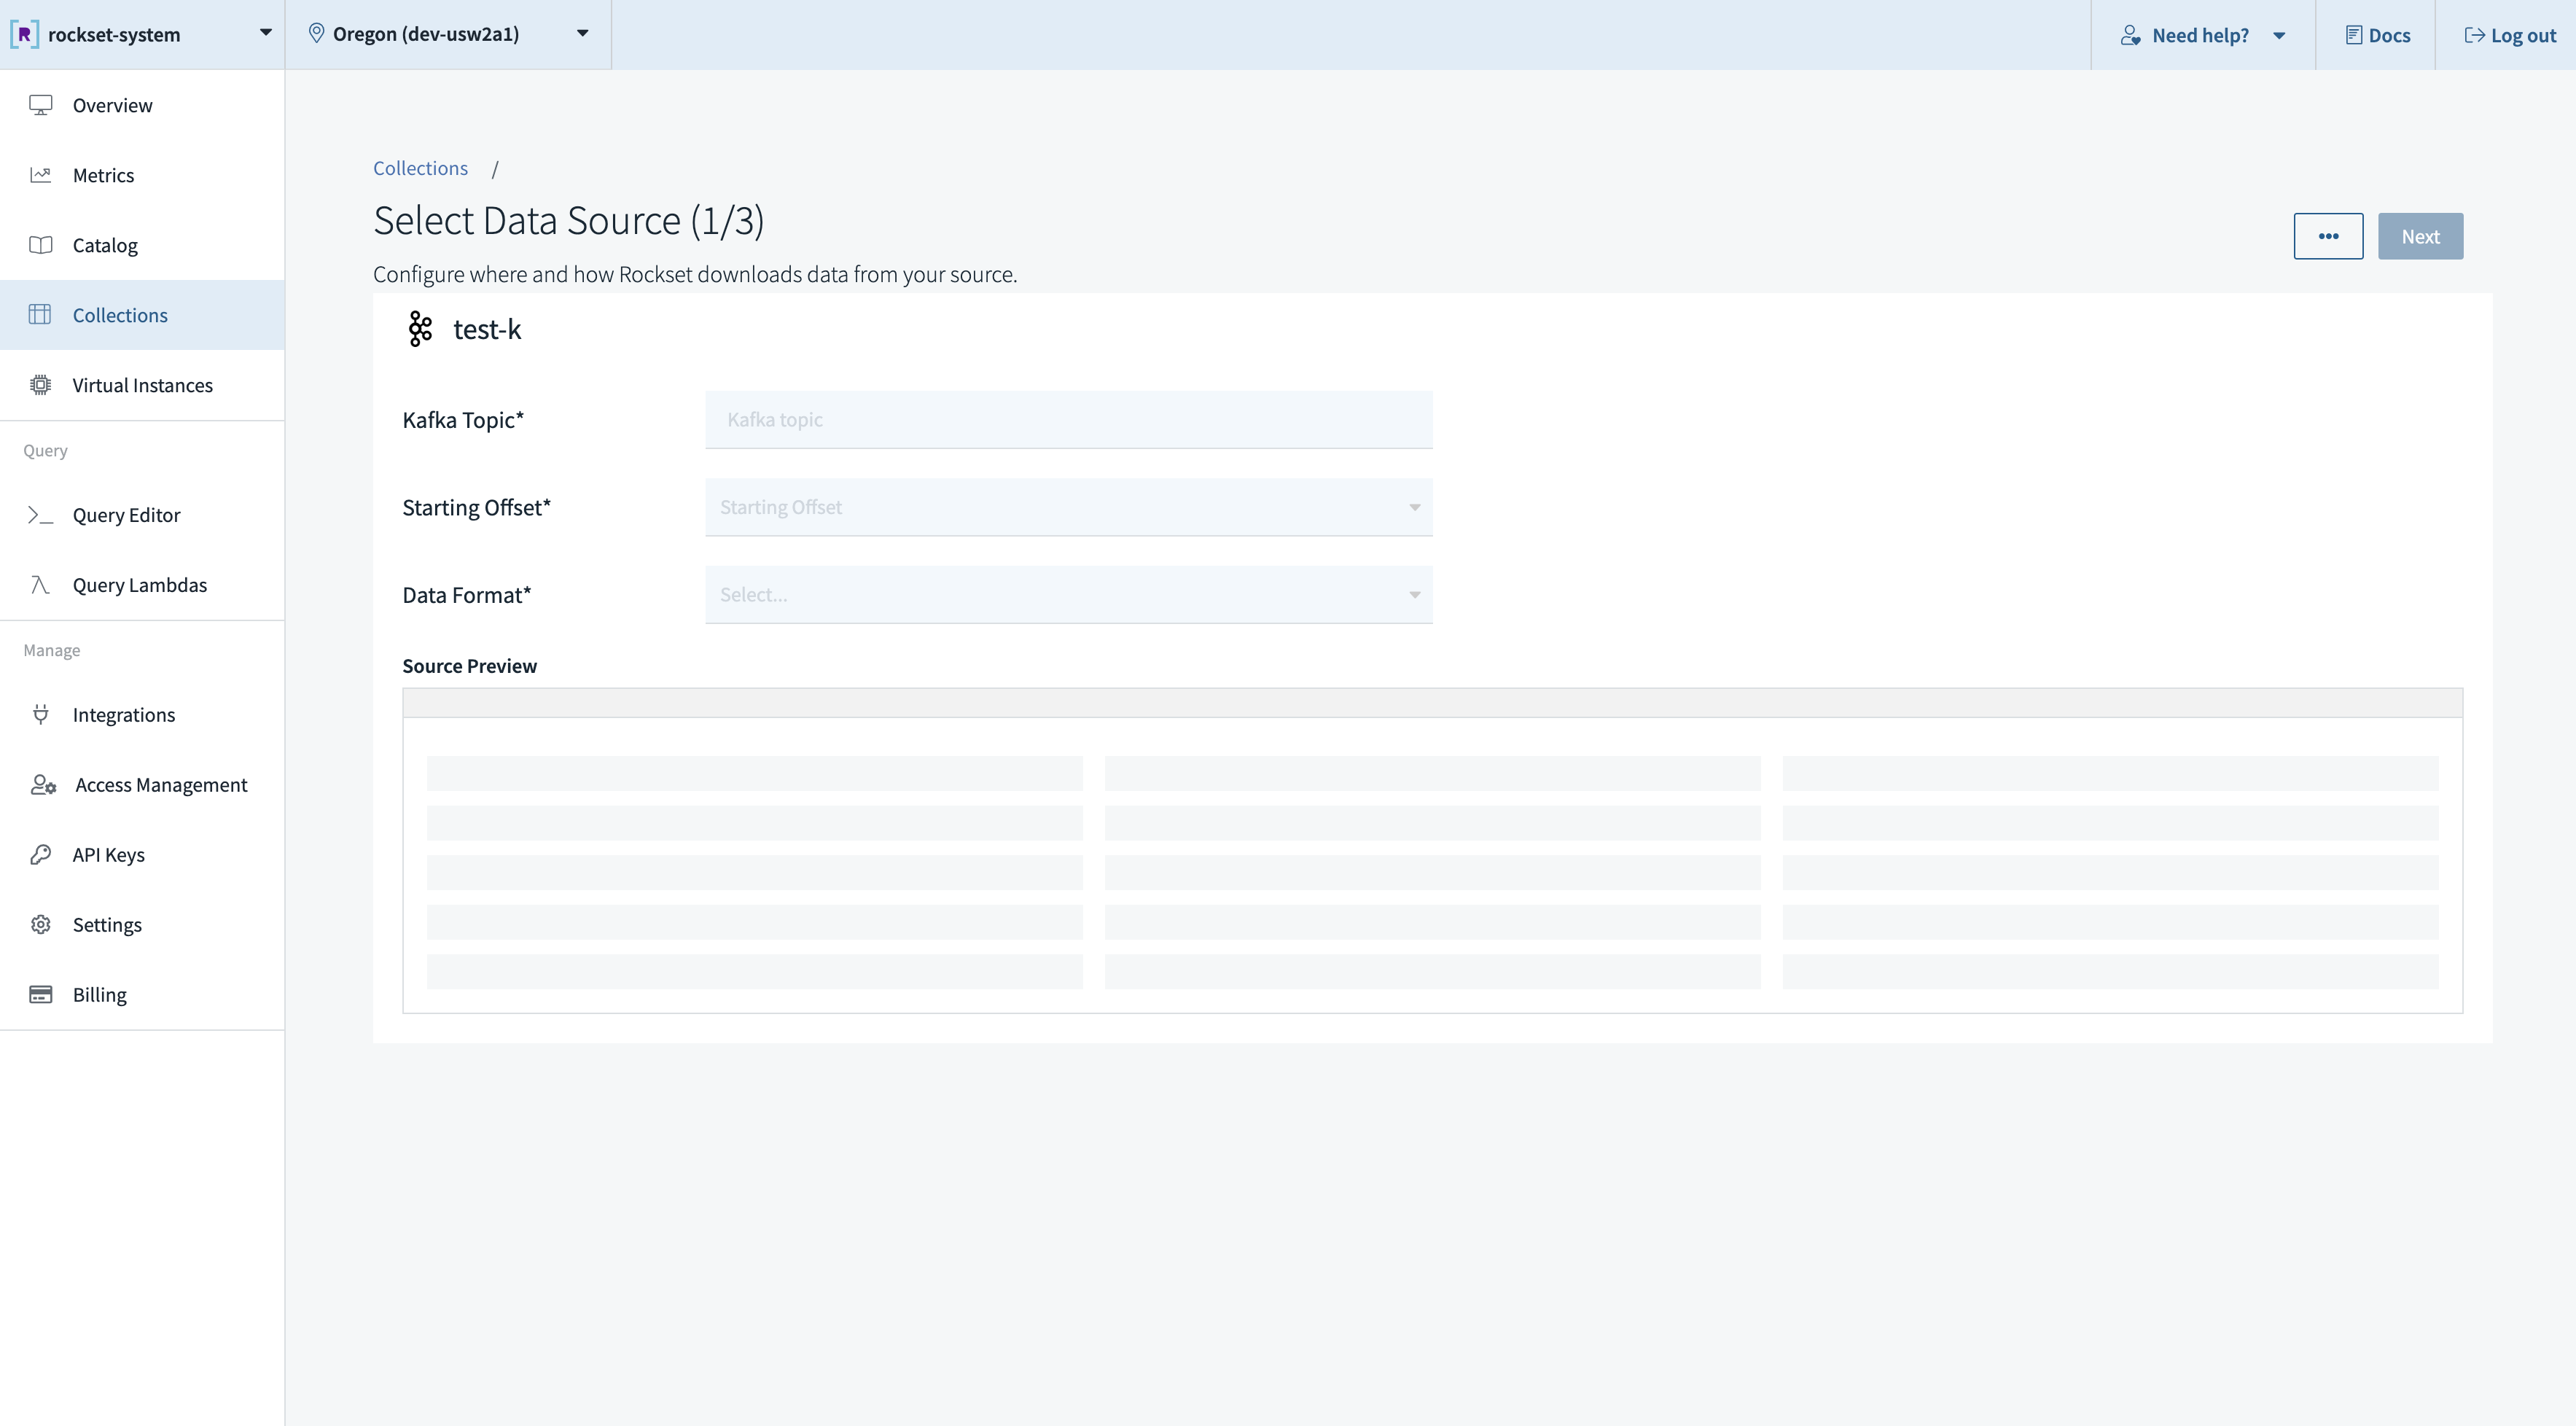
Add a source which maps to a single Kafka topic. The required inputs are:
- Topic name
- Starting offset
- Specify the Starting Offset. This will determine where in the topic Rockset will begin ingesting data from. This can be either the earliest offset or the latest offset of the topic.
- Earliest: The collection will contain all of the data starting from the beginning of the topic. Choose this option if you require all of the existing data in the Kafka topic.
- Latest: The collection will contain data starting from the end of the topic, which means Rockset will only ingest records arriving after the collection is created. Choose this option to avoid extra data ingestion costs if earlier data is not necessary for your use case.
- Specify the Format of messages in the Kafka topic. Currently, Rockset supports processing JSON and Avro message formats.
After you create a collection backed by a Kafka topic, you should be able to see data flowing from your Kafka topic into the new collection. Rockset continuously ingests objects from your topic source and updates your collection automatically as new objects are added.
Limitations
- AVRO is not yet supported as a data format with MSK.
Updated about 1 year ago
